Add New Agent & Set Permissions in Mark360.ai
What is an Agent in Mark360.ai?
An Agent in Mark360.ai is a team member who can handle conversations, run campaigns, manage templates, and much more — depending on the permissions you assign. You can assign each agent to a specific team and control what features they can access inside the system.
How to Create a New Agent?
Follow the steps below to create a new agent and assign permissions:
Step-by-Step Guide:
-
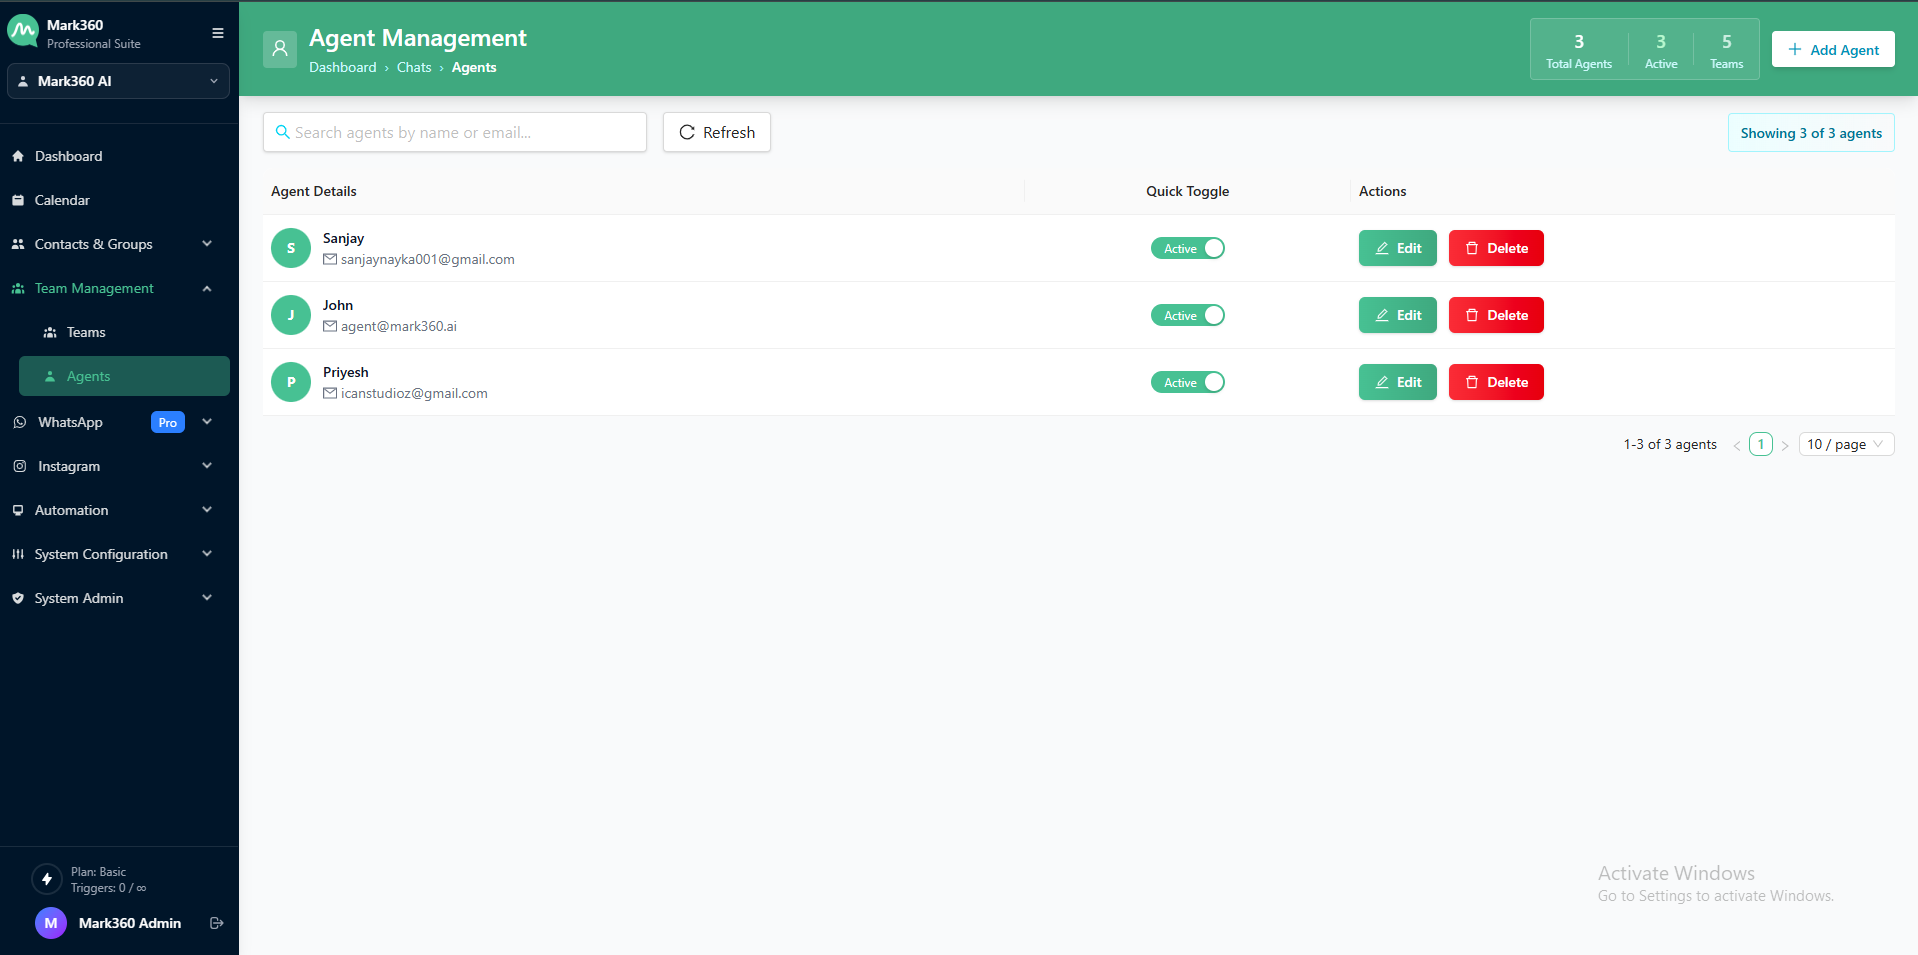
Navigate to "Team Management" from the left sidebar of your Mark360.ai dashboard.
-
Click the "Agents" tab.
-
Hit the "Add Agent" button — a popup will appear.
-
Fill Agent Details:
- Full Name
- Email Address (used for login)
- Mobile Number (optional)
- Assign to Team (Choose from the previously created teams)
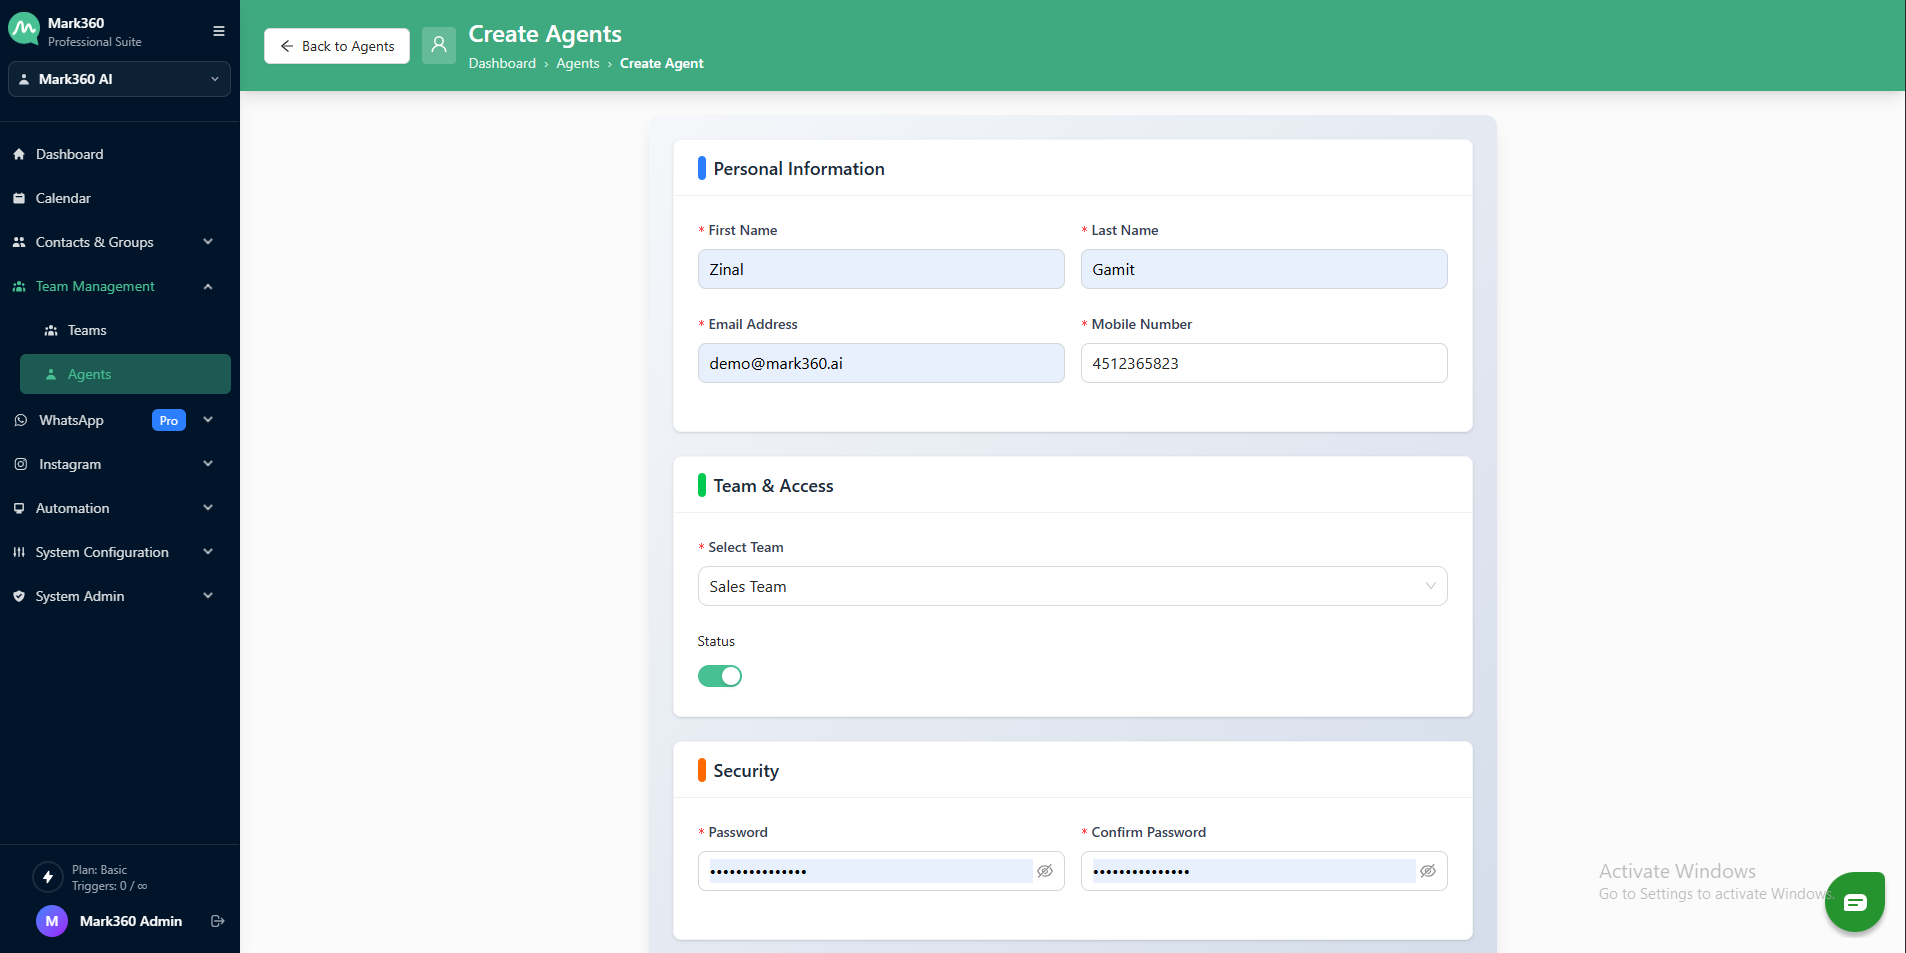
-
Set Permissions: Enable only the permissions relevant to this agent's responsibilities by toggling the switches. Here's the full list of available permissions:

Available Permissions:
| Permission | Description |
|---|---|
| Manage Contacts | View, add, and update contact data |
| Manage Contact Groups | Create and manage contact segments (groups) |
| Manage Uploads | Upload media/files into the system |
| Manage Templates | Create and edit WhatsApp templates |
| Manage Campaign | Launch and monitor campaigns |
| Manage Chats | Access and reply to customer chats |
| Manage Teams | Create and edit teams |
| Manage Agents | Add, edit, or remove agents |
| Manage RepliesLibrary | Create canned responses for quick replies |
| Manage Sequence | Create message sequences for automation |
| Manage Flows | Build and edit chat flows |
| Manage Dashboard | Access analytics and reports |
| Manage Users | Add/remove users from the workspace |
| Manage Categories | Create and organize item categories |
| Manage Organizations | Manage org-level settings |
| Manage CustomField | Create and manage custom contact fields |
| Manage Bots | Create and assign bots |
| Manage Triggers | Configure automation triggers |
| Manage ChatWidgets | Build and embed chat widgets |
| Manage KnowledgeBase | Create help articles or FAQs |
| Manage Catalogs | Upload product catalogs |
| Manage Catalog Orders | Track orders received via catalogs |
| Manage Flows Responses | View collected flow responses |
| Manage Integrations | Connect third-party tools |
| Manage Payments | Request and track payments |
| Manage ChannelSettings | Configure WhatsApp/Facebook settings |
| Manage ApiTokens | Generate and manage API access tokens |
- Once done, click "Create Agent".
Your new agent is now added to the system and will receive login details via email (if configured). They can now log in and access only the parts of the system you’ve allowed.
Best Practices:
- Grant only the permissions required for their role to improve security.
- Assign agents to relevant teams to ensure smooth assignment of chats and tasks.
- Use role-based permission groups if you manage many agents.
Need help setting up onboarding flows or automated messages for your new agents? Reach out to Mark360.ai Support or explore the Flows section to start building!