Knowledge Base
The AI Knowledge node allows you to integrate your chatbot with a Knowledge Base, enabling it to provide intelligent and context-aware responses. This feature helps automate customer support by pulling accurate information directly from your connected data source.
Overview
Configure your AI bot to respond effectively using predefined information from your Knowledge Base.
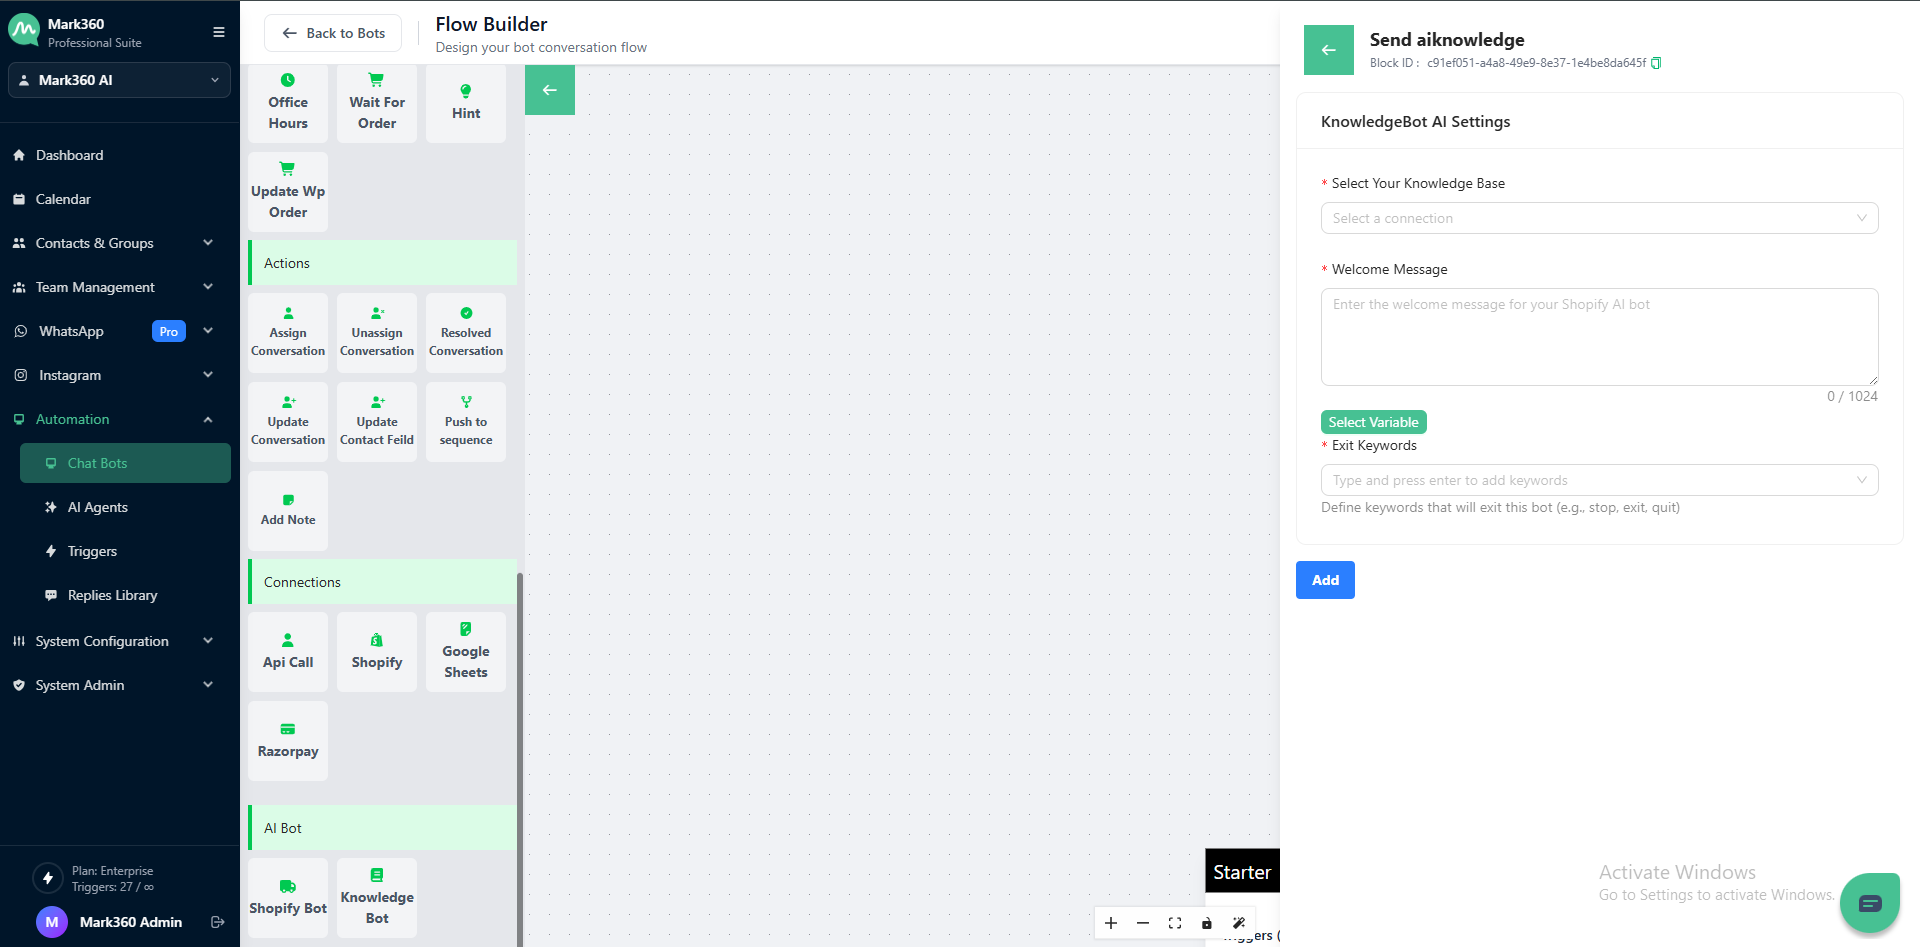
Select Your Knowledge Base
Choose the Knowledge Base connection you want your bot to use.
This is the source from which the bot retrieves answers to customer queries.
💡 Tip: Make sure your Knowledge Base is properly connected before enabling this node.

Welcome Message
Add a Welcome Message to greet users when they interact with your AI bot for the first time.
This message sets the tone and context for the conversation.
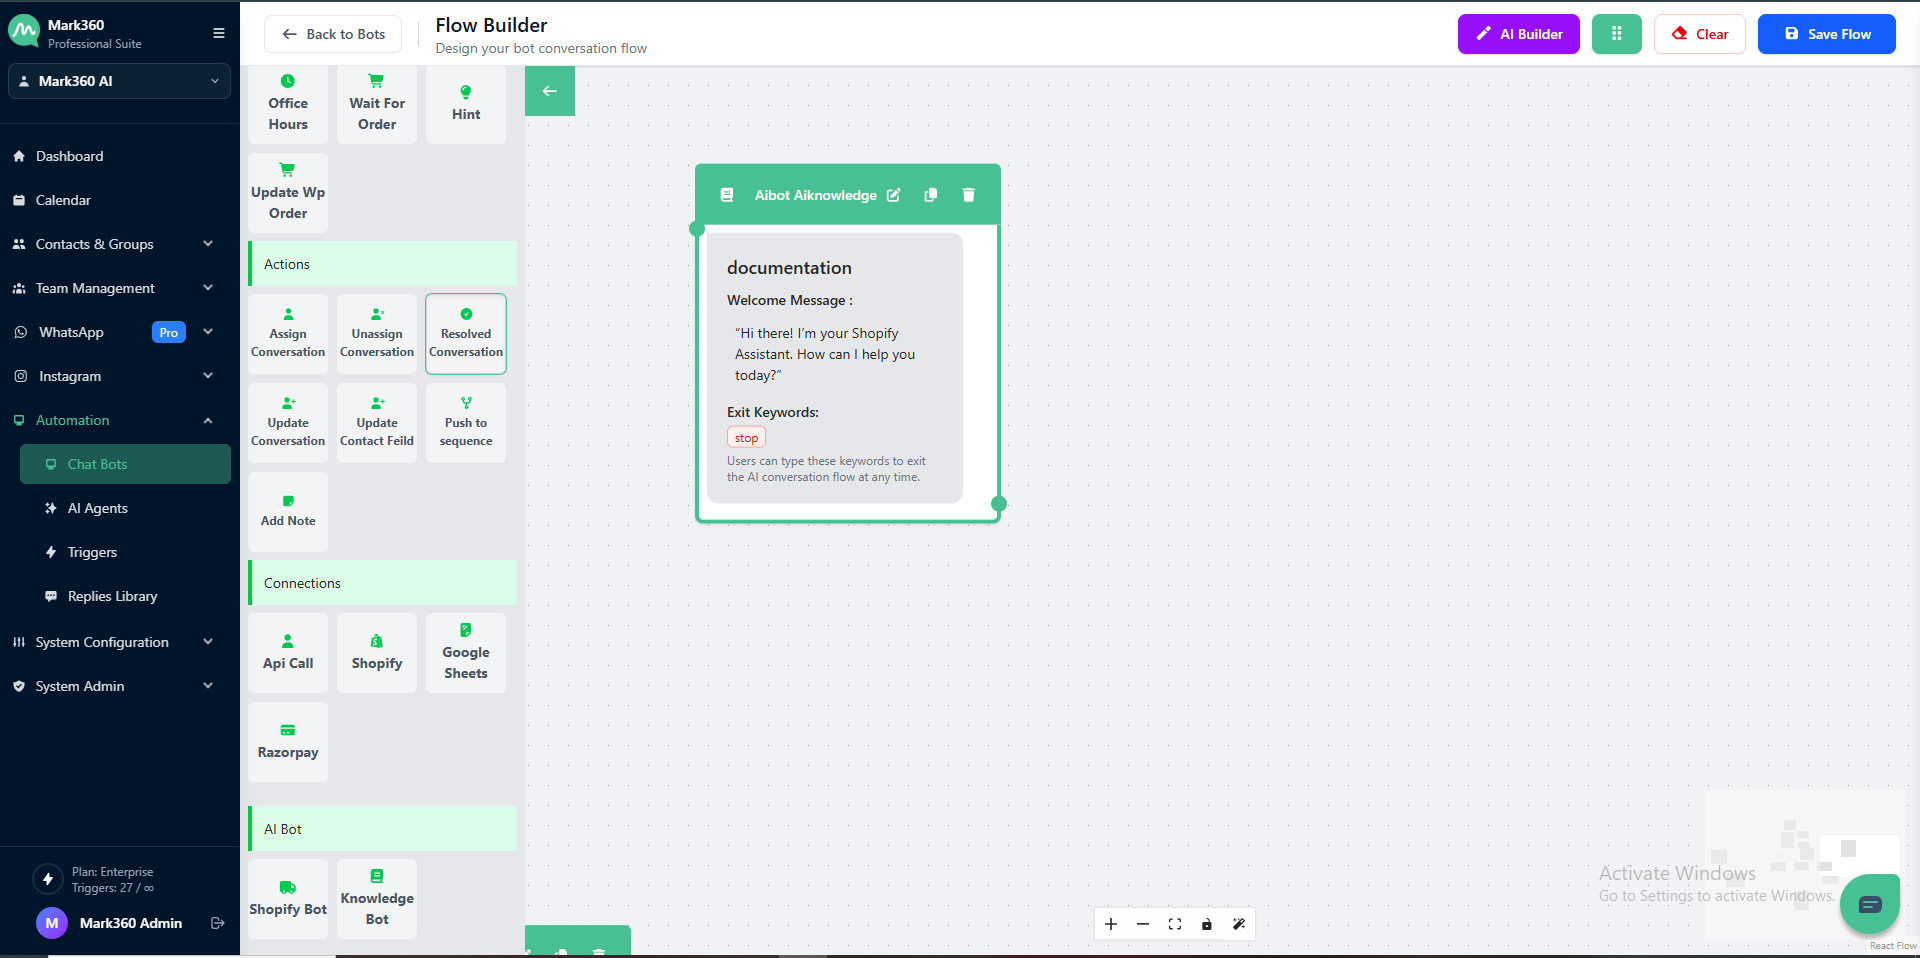
Example:
“Hi there! I’m your Shopify Assistant. How can I help you today?”
You can also click Select Variable to insert dynamic data such as customer name, order number, or product details.

Exit Keywords
Define Exit Keywords that allow users to leave the AI conversation easily.
When any of these keywords are entered, the AI session will end automatically.
Examples:
stop, exit, quit, end chat
To add:
-
Type a keyword in the input box.
-
Press Enter to add multiple exit commands.

Final Steps
Once all fields are configured:
-
Review your Knowledge Base selection and welcome message.
-
Set appropriate exit keywords.
-
Click Add to save and activate your AI Knowledge node.
Your AI-powered bot is now ready to deliver smart, accurate, and conversational responses to your users!
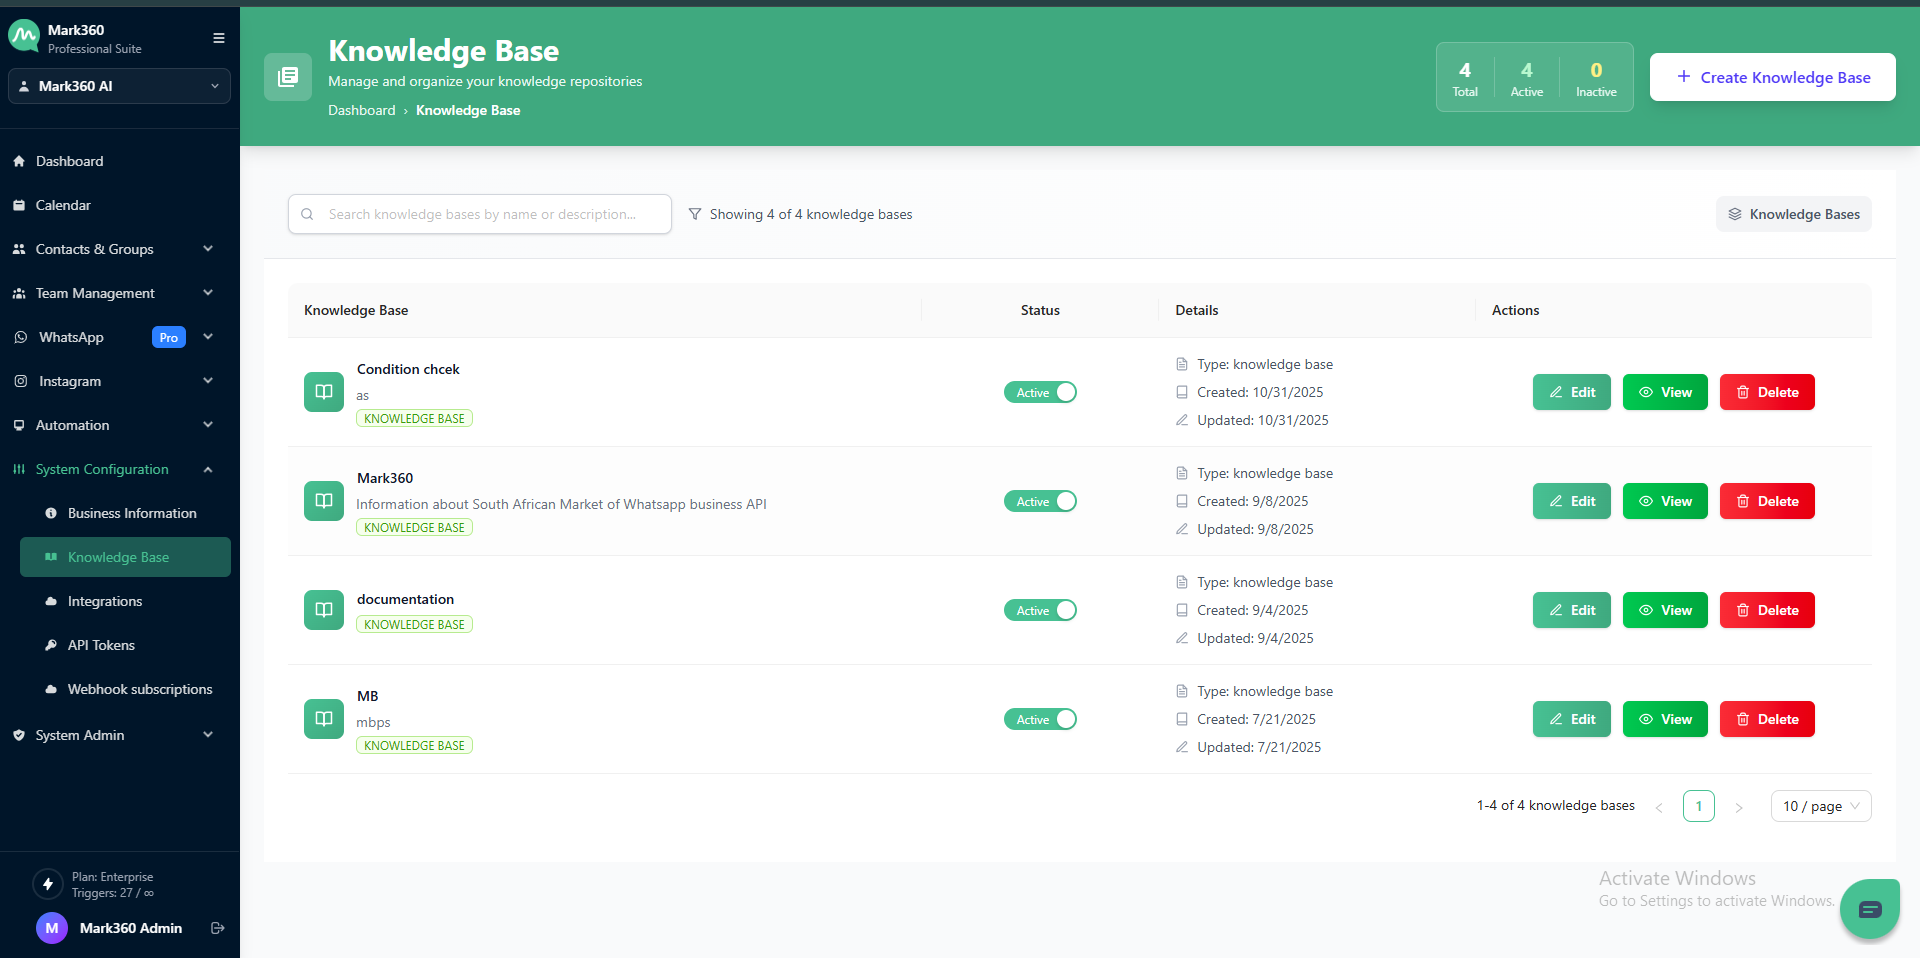
Create Knowledge Base
To start with the Knowledge Base Node, you have to create a Knowledge Base in your Mark360 Account.
Add Knowledge Base
-
Naviagte to the System Configuration and Click on knowledge Base.
-
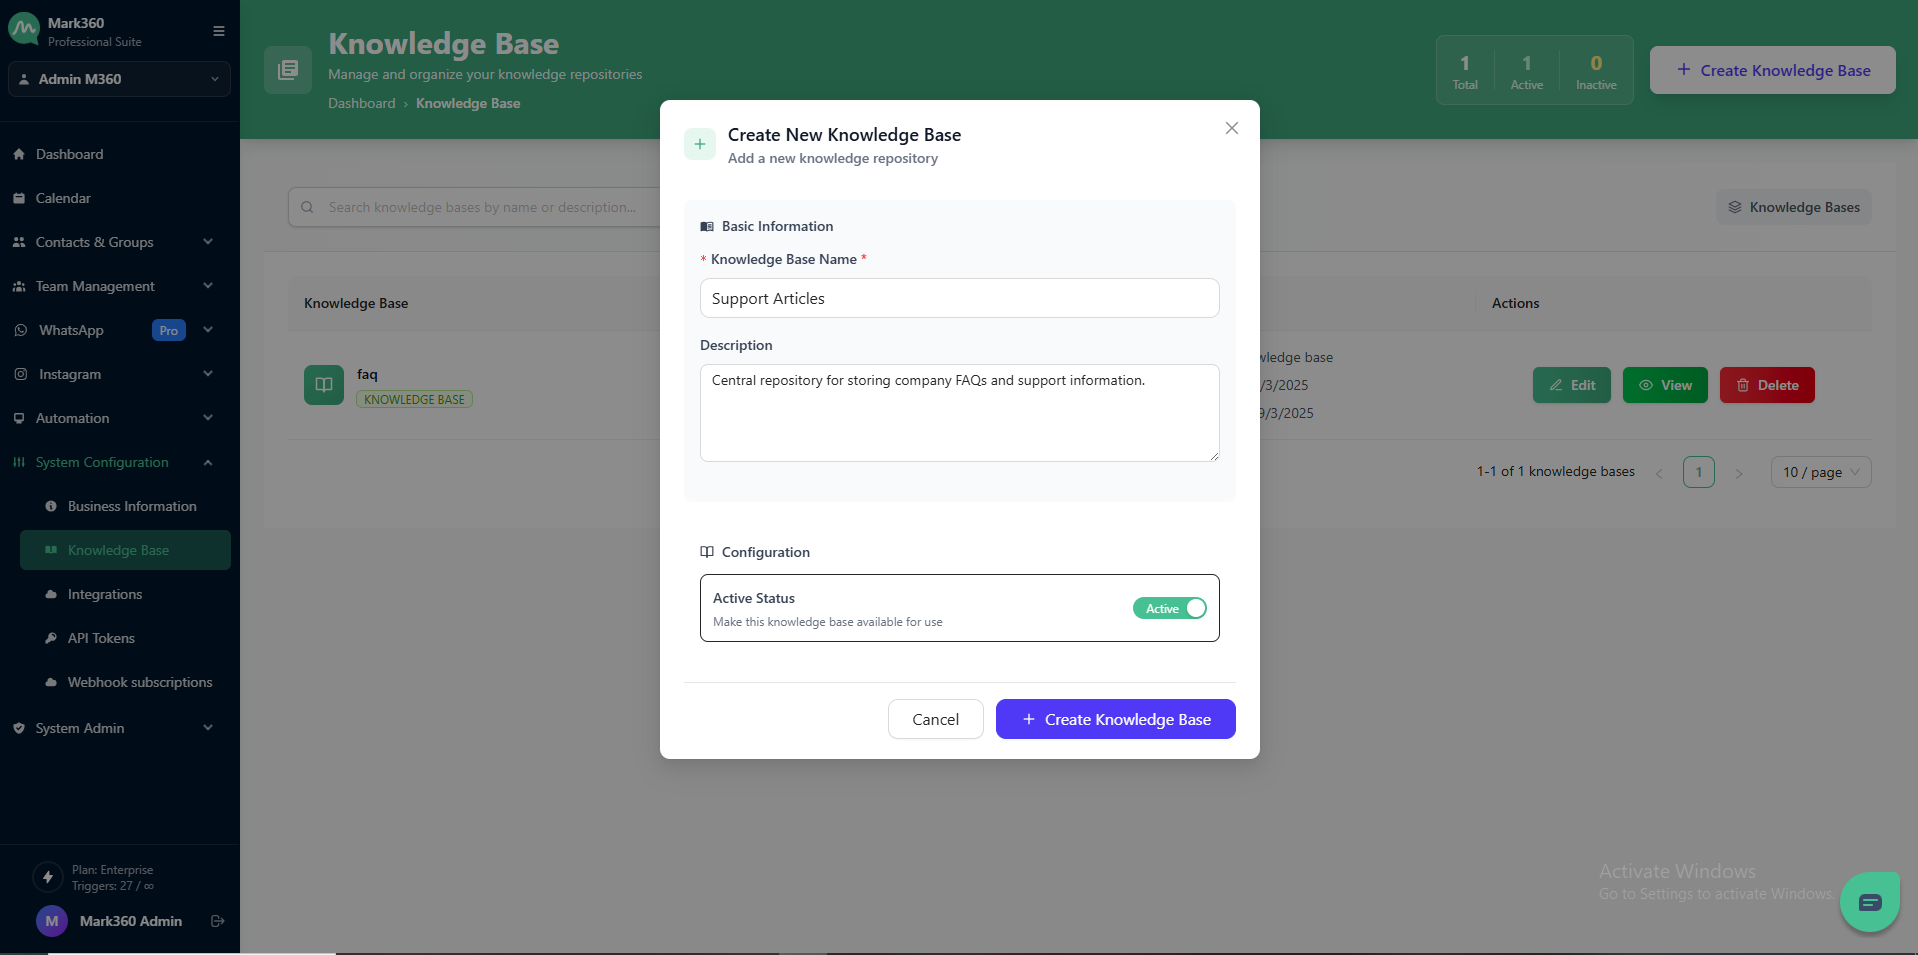
Click on “+ Create Knowledge Base” at the top-right corner of the screen.
- In the Create New Knowledge Base pop-up, enter a suitable Knowledge Base Name.
- Optionally, add a Description to specify the purpose or contents of this Knowledge Base.
-
Under Configuration, toggle the Active Status if you want to make this Knowledge Base available for use immediately.
-
Finally, click Create Knowledge Base to save your new Knowledge Base.
View Knowledge Base and Add Articles
Once a Knowledge Base has been created, you can view its analytics and manage articles easily.
Step 1: View Knowledge Base
In the Knowledge Base list, go to the Actions column and click View.
This will open the Analytics Overview page for the selected Knowledge Base.
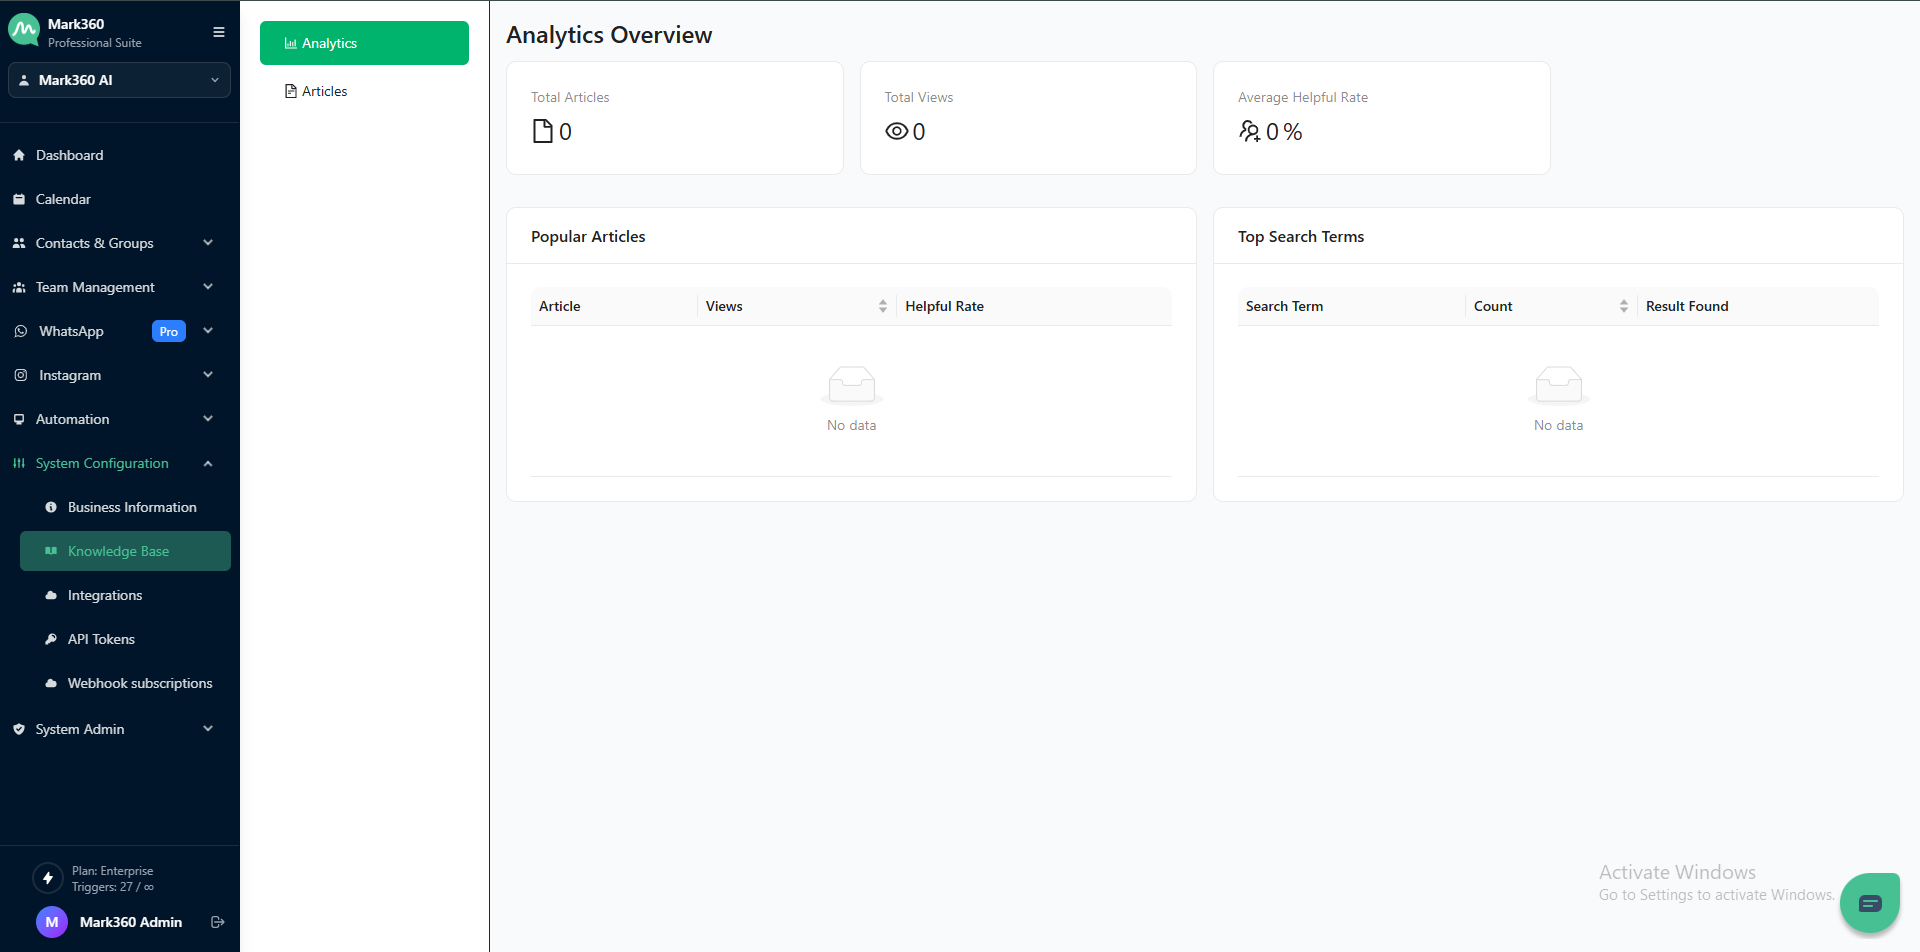
Analytics Overview Includes:
- Total Articles: Number of articles created within the knowledge base.
- Total Views: Number of times articles have been viewed.
- Average Helpful Rate: Percentage of helpful feedback from users.
- Popular Articles: Displays top-performing articles based on helpful rate and views.
- Top Search Terms: Shows most searched keywords and how many results were found.
Step 2: Add Articles
To add a new article, click the Articles tab on the left panel and then click + Add Article.
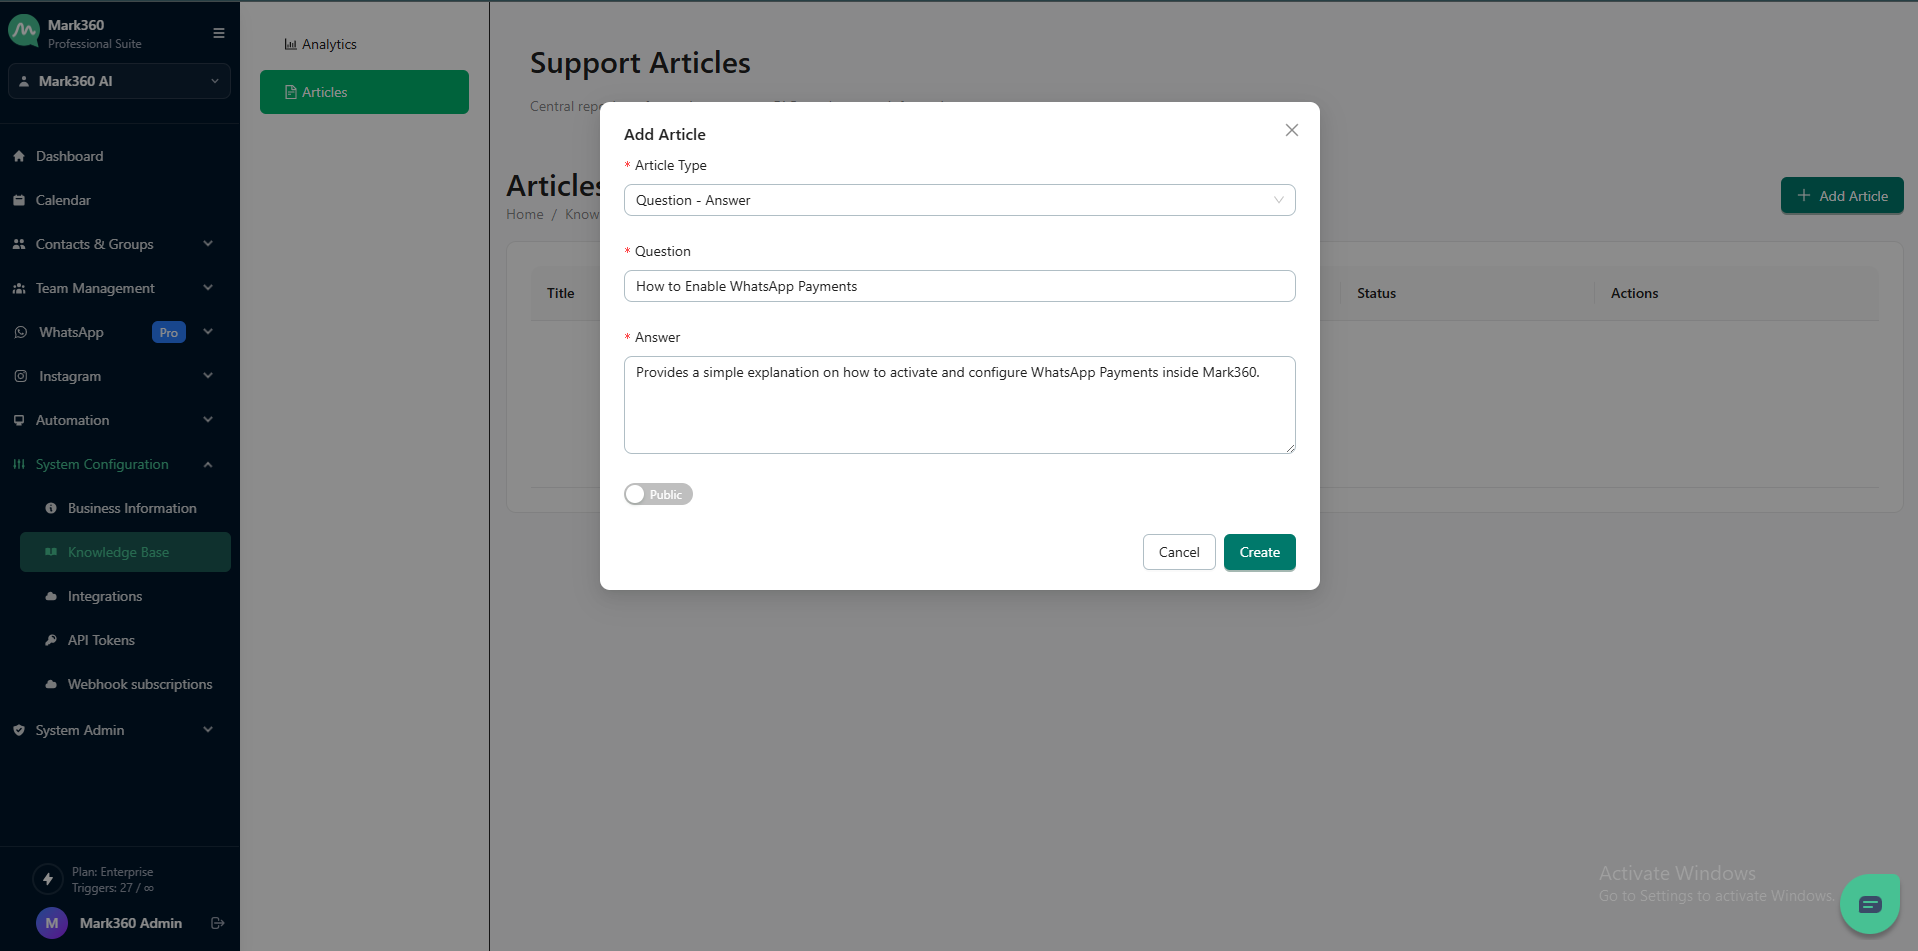
Fill in the following details:
- Article Type: Choose the type of article you want to create:
- File: Upload a file (PDF, DOCX, etc.) containing your article content.
- Text: Write and save your content directly in the editor.
- Q&A: Add question-and-answer pairs for chatbot or FAQ-based replies.
- Title: Enter the title of the article.
- Description: Write a short summary explaining what the article covers.
- File: Upload the content file for the article.
- Visibility Toggle: Set whether the article should be Public (visible to all) or Private (accessible only to internal users).
Finally, click Create to save your article.
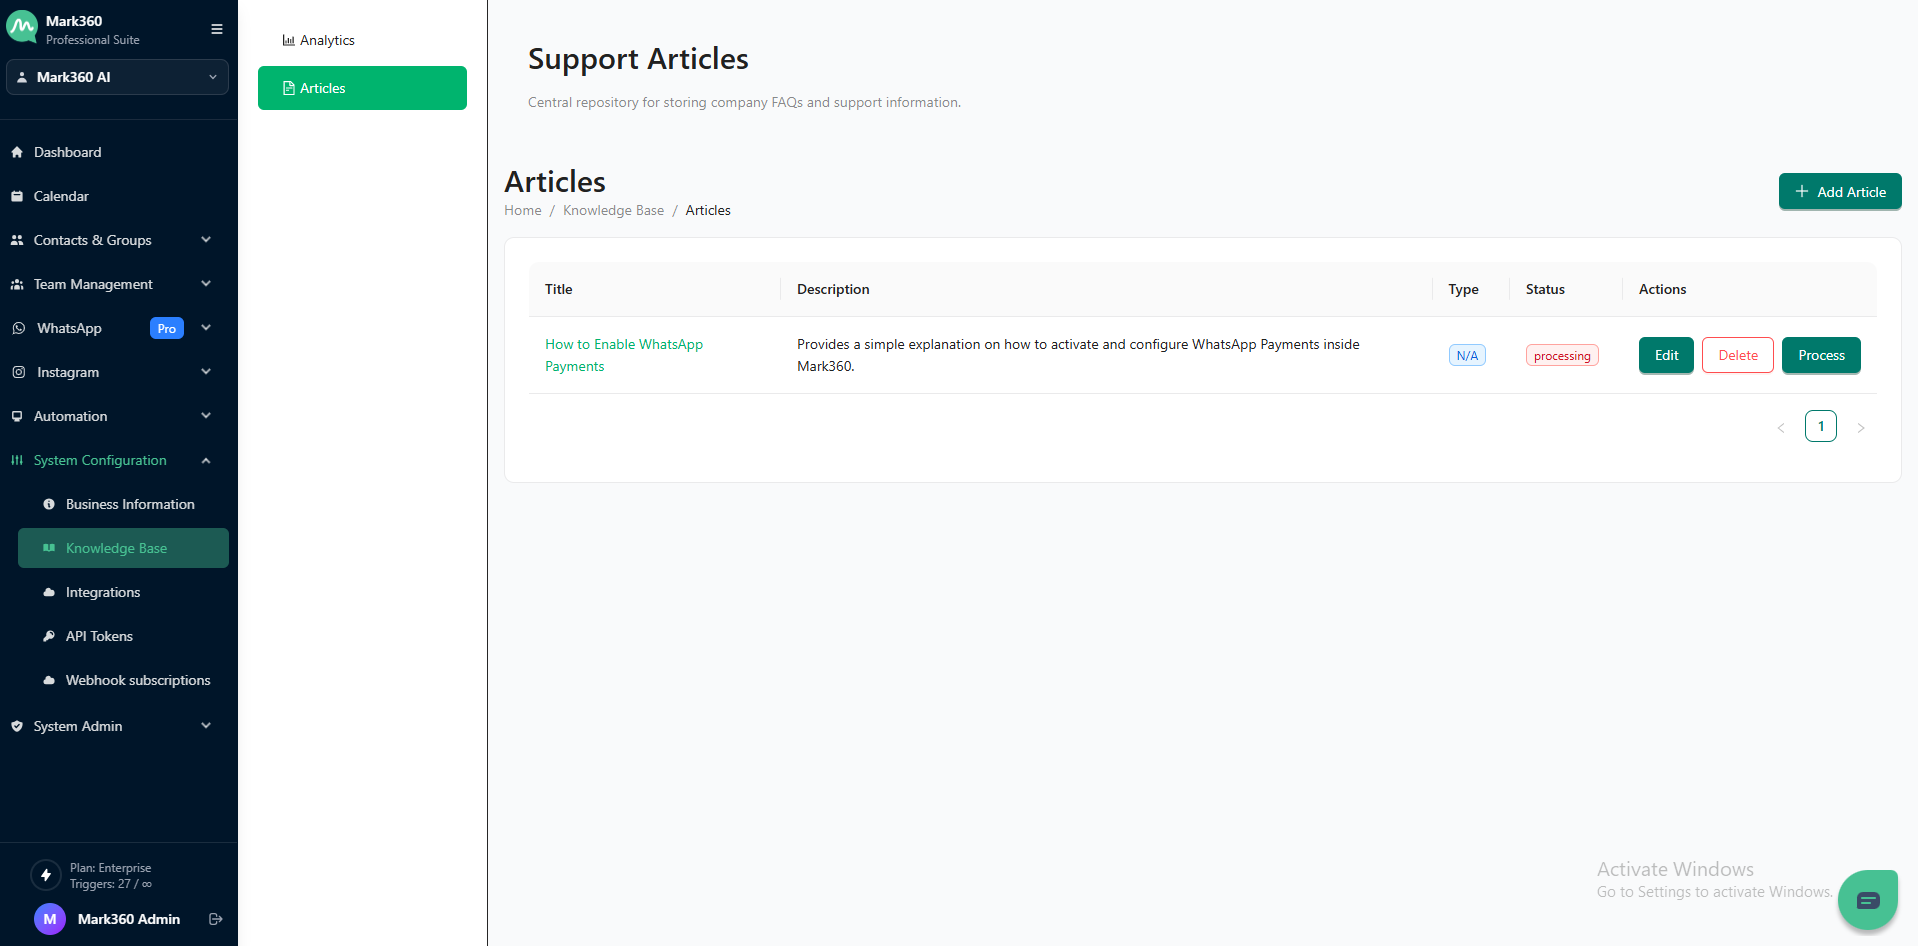
After Creating an Article
Once your article is created, it will appear in the Articles list under the Support Articles section.
This section serves as the central repository for storing company FAQs and support documentation within Mark360.
Article List Overview
Each article entry displays the following details:
| Field | Description |
|---|---|
| Title | The name of the article. Clicking the title opens the full article view. |
| Description | A short summary that explains what the article is about. |
| Type | Indicates the article format — File, Text, or Q&A. If not specified, it shows as N/A. |
| Status | Displays the current state of the article, such as Processing, Published, or Draft. |
| Actions | Provides quick controls to manage the article — Edit, Delete, or Process. |
Action Buttons Explained
-
Edit: Modify the article title, description, or content type.
-
Delete: Permanently remove the article from the system.
-
Process: Review and finalize the article to make it active or ready for publishing.