Chat Widget For Your Website – mark360.ai
The WhatsApp Live Chat Widget helps you connect with your website visitors instantly through WhatsApp.
It’s an easy and effective way to boost customer engagement and offer real-time support.
Why Use the Live Chat Widget?
- 💬 Instant Chat Support: Allow visitors to start a WhatsApp conversation directly from your website.
- 🧭 Better Engagement: Build trust and improve user experience with quick responses.
- ⚙️ Fully Customizable:
- Add your business logo
- Write a personal welcome message
- Choose your widget position (left or right side of the screen)
How It Helps Your Business
With the Live Chat Widget, your business can:
- Respond faster to customer queries
- Build stronger relationships through direct communication
- Turn visitors into loyal customers
Create the WhatsApp Live Chat Widget — Step by Step
Follow these steps to build and publish your WhatsApp Live Chat Widget on Mark360.
-
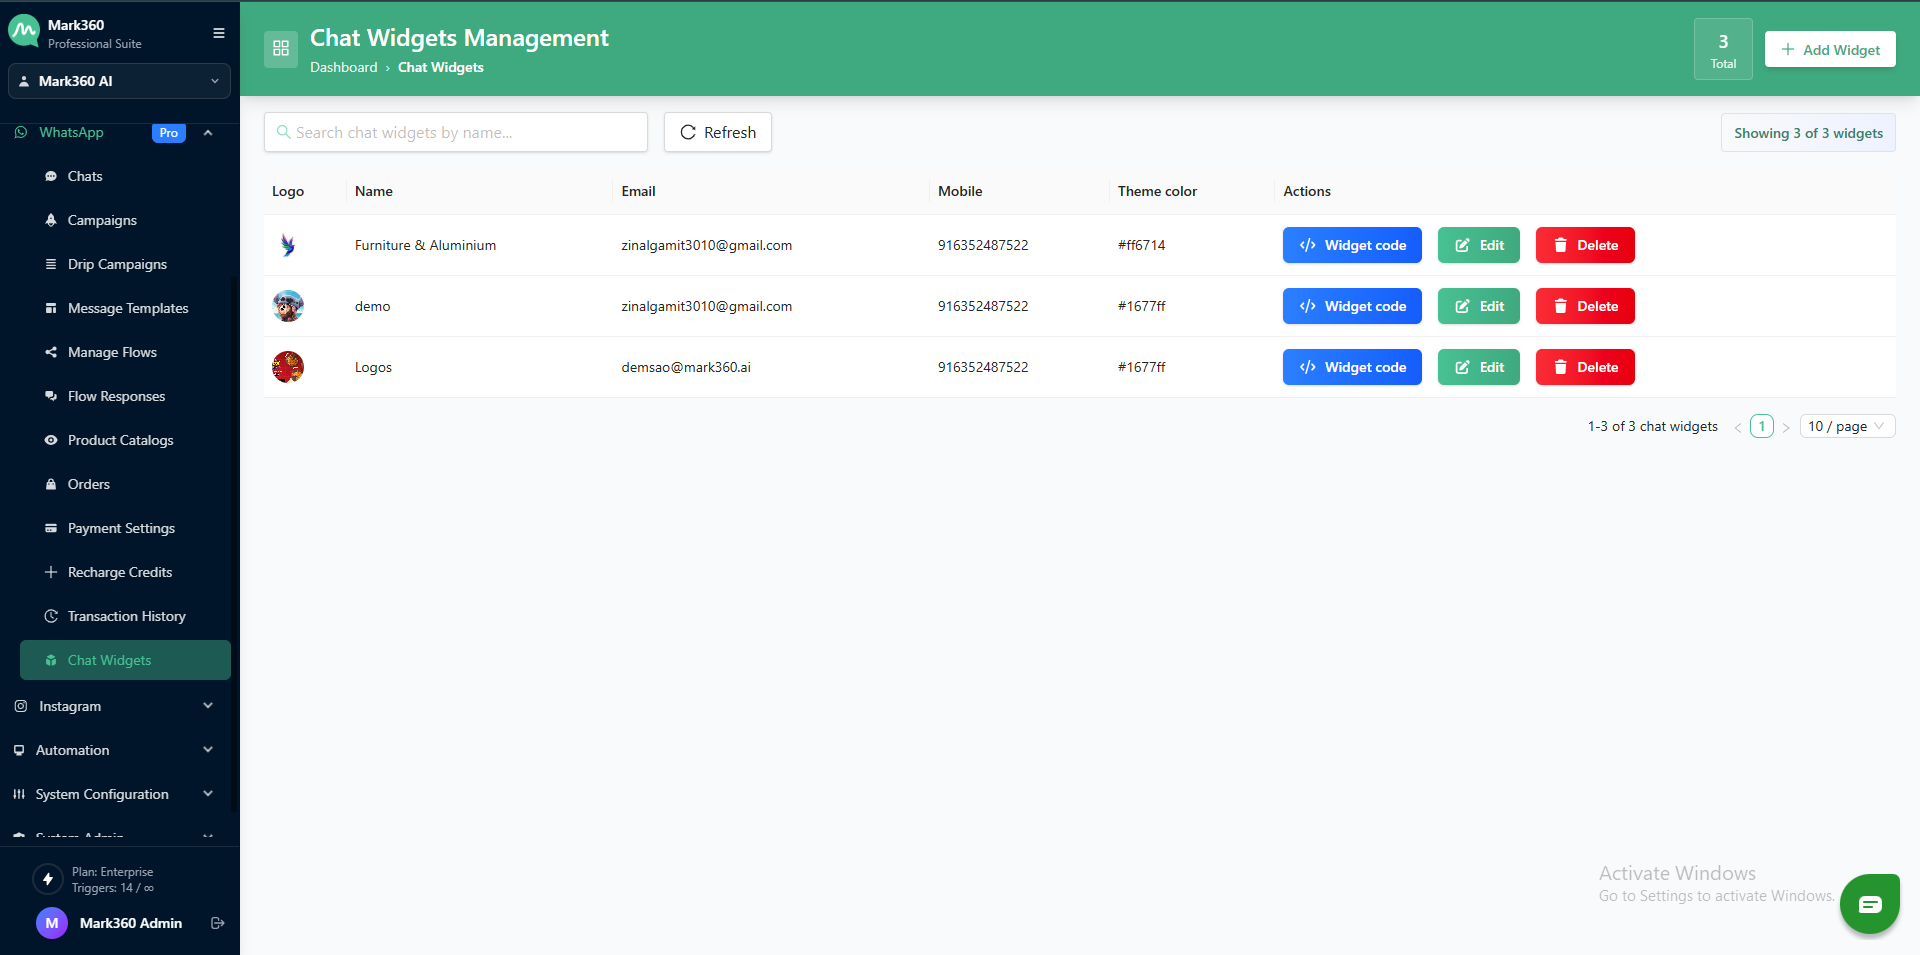
Open the Chat Widgets page
-
Go to the Mark360 dashboard → WhatsApp → Chat Widgets.
-
Click on + Add Widget
-
On the top-right corner, click the ➕Add Widget button.
-
-
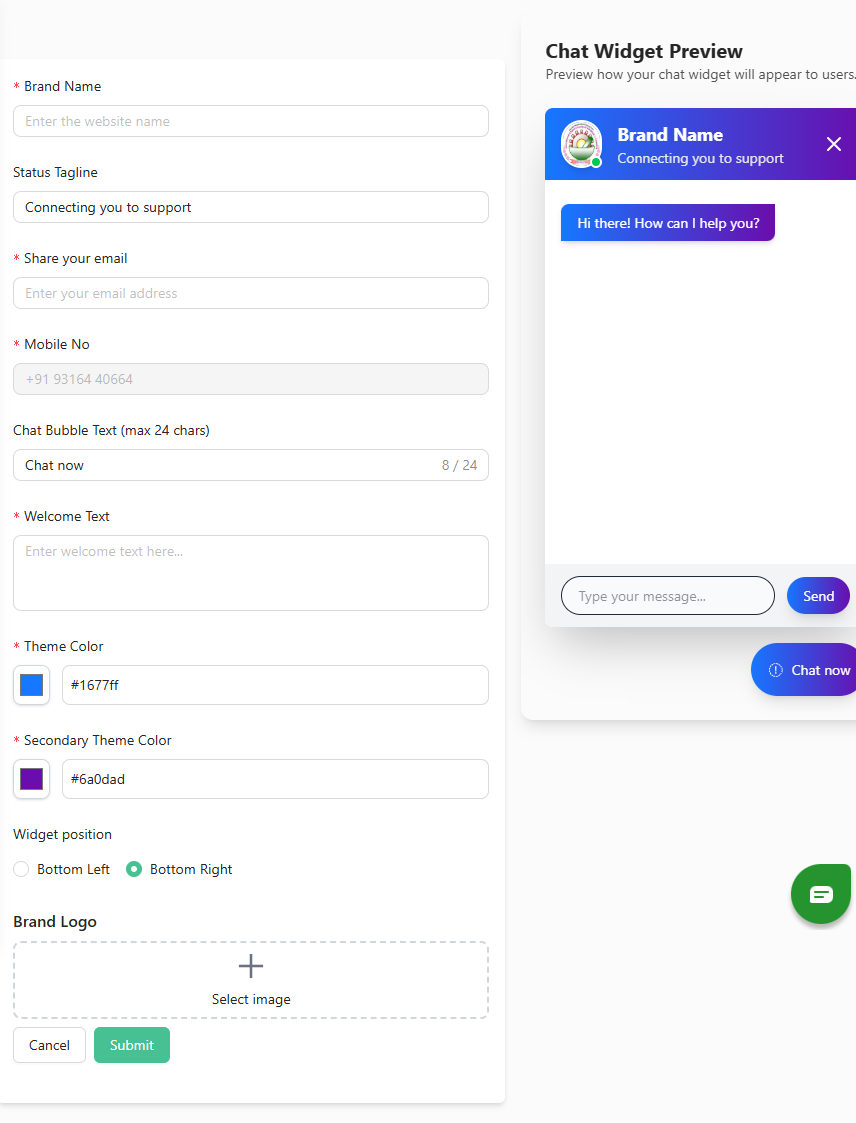
Add your brand info
-
Brand Name: Enter your website or company name (e.g.,
Mark360). -
Status Tagline: Short line under the brand (e.g.,
Connecting you to support).
-
-
Enter contact details
-
Email: Add an email for support or notifications.
-
Mobile No: Enter the WhatsApp number that will receive messages.

-
-
Set the chat bubble label
- Chat Bubble Text: Add a short label (max 24 chars). Examples:
Chat now,Need help?.
- Chat Bubble Text: Add a short label (max 24 chars). Examples:
-
Write the welcome message
-
Welcome Text: The greeting users see when the chat opens. Keep it friendly and brief.
-
Example:
Hi! 👋 Welcome — how can we help today?
-
-
Choose theme colors
-
Pick a Primary and Secondary color — these control the header, buttons, and accent areas.
-
Example hex values:
#0b8fdd(primary),#8a2be2(secondary).
-
-
Pick widget position
- Choose Bottom Right or Bottom Left.
-
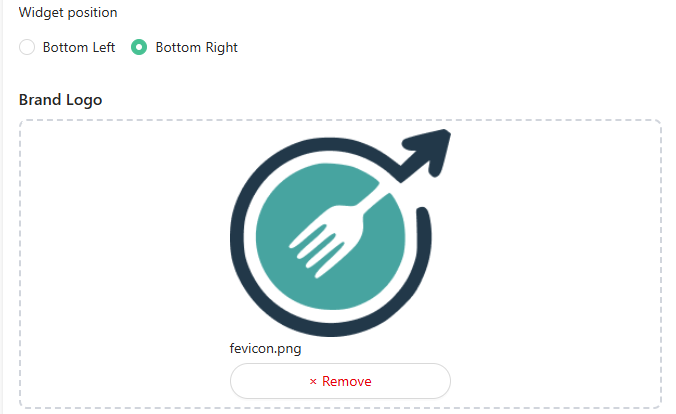
Upload your logo or avatar
-
Click Select image and upload a PNG/JPG logo.
-
Use a clear, simple logo (transparent background preferred).
-
-
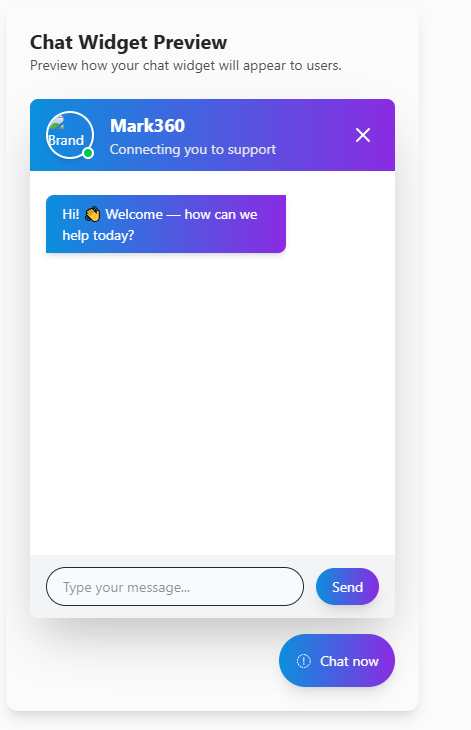
Preview the widget
-
The preview (right side) updates live. Check text, colors, logo, and position before saving.
-
-
Save and publish
- Click Submit.
Generate Widget Code
Once your chat widget is created and configured, click on “Widget Code” from the Actions section to open the script view.
A popup will appear showing the automatically generated code snippet that you’ll need to embed on your website.
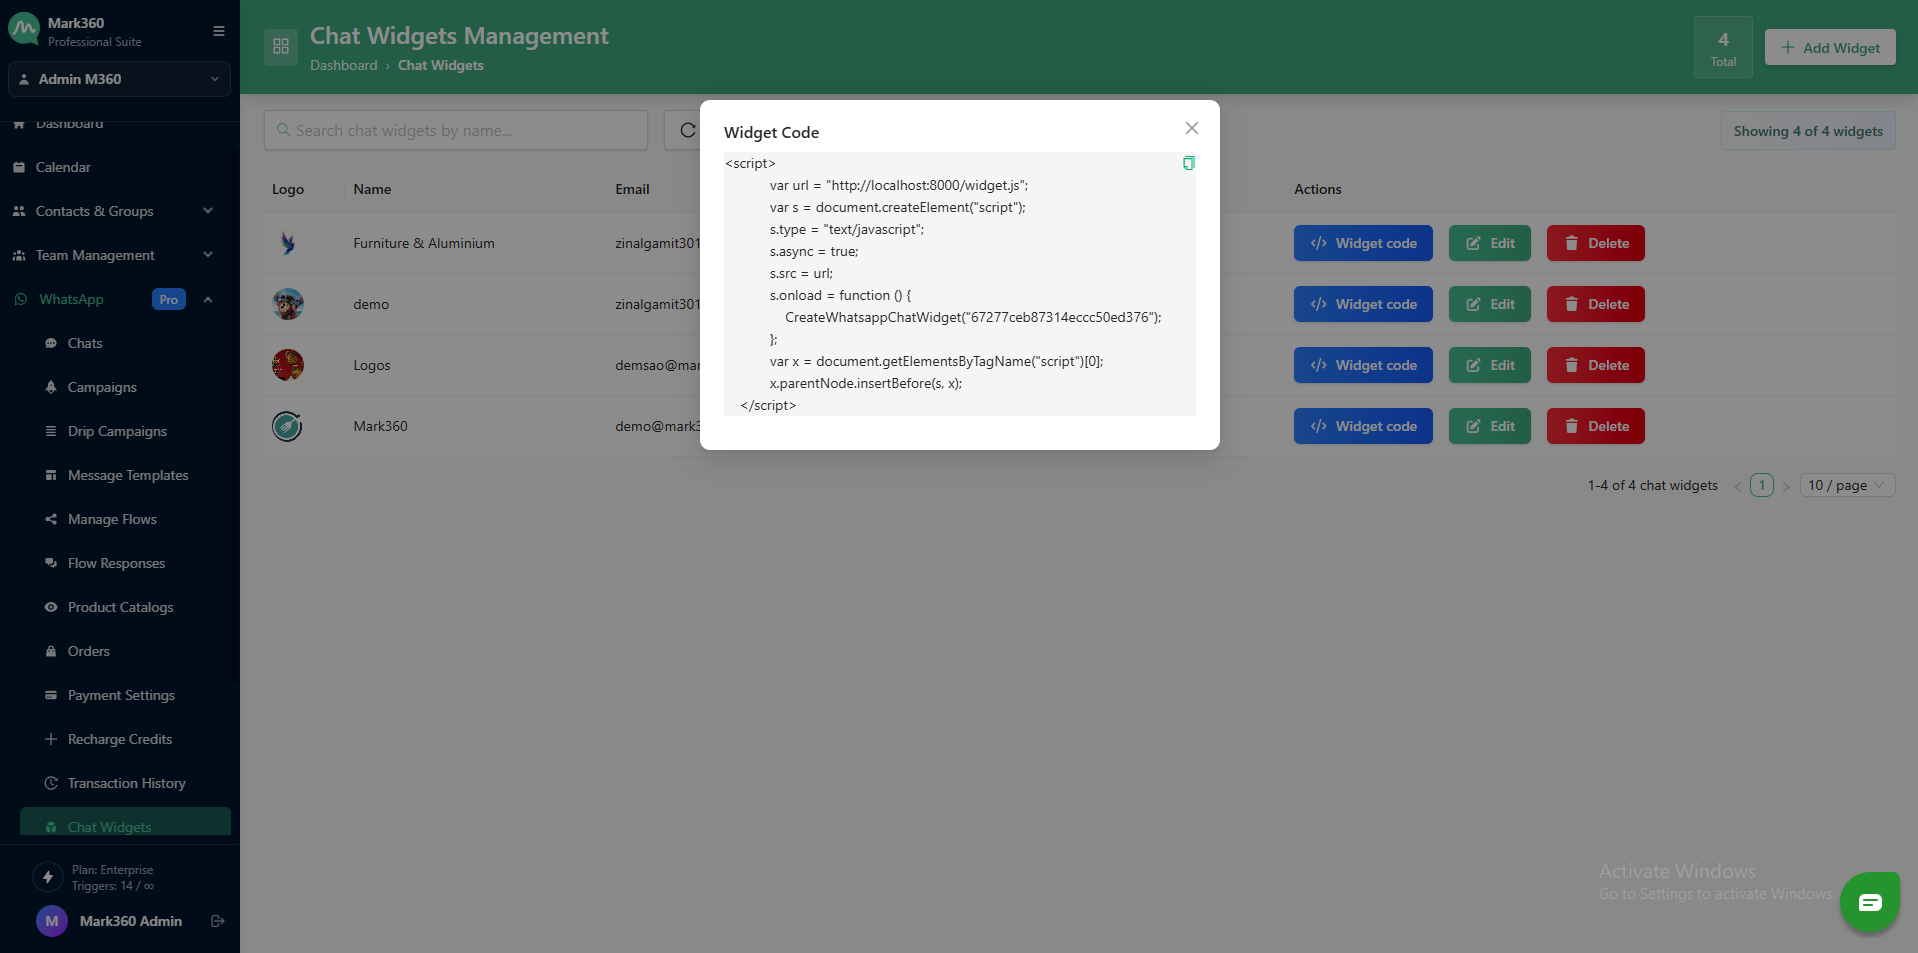
Add the Code to Your Website
Copy the entire code snippet and paste it into your website’s HTML source code—preferably right before the closing </body> tag.
This placement ensures that the widget loads only after the rest of your webpage has been rendered.
💡 Note : To integrate the widget into your website, you'll need access to your website's code. Contact your development Team. If you're using a website builder or content management system (CMS) like WordPress, there's often a dedicated area for adding custom code snippets.